Monday, September 28, 2015

Google Classroom Waffle Shortcut

I know that Google Classroom is a hot tool right now. It is being used with K-12 students everywhere. The older students can type classroom.google.com easy enough or create a short cut with no issue. It is the younger (K-5) students that struggle with getting there sometimes. So, here comes Google to the rescue...sort of. All those great Google Tools are stored in the Waffle (Apps Launcher). You know, that time saving little 9 dot grid. Well, here is the problem. The Google Classroom icon is not always there. It seemed random until I stumbled on a post explaining its mysterious disappearance and reappearance. Here is how to find that life-saving Google Classroom icon in the bottom of your Waffle! 


Google Classroom Waffle Shortcut

  1. Sign into your Google Account.
  2. Go to any core Google tool (Gmail, Calendar, or Drive).
  3. Look at the waffle and scroll to the very bottom. There you will see the Google Classroom icon. Yea!!!


  1. Now go to google.com or any other google site that is not one of the core tools.
  2. Look at the waffle and scroll to the very bottom. There you will NOT see the Google Classroom icon. Boo!!!


In order to see the icon, you just need to be in a core tool. Why? No ones seems to be sure. If this bugs you, PLEASE go to the help icon in Google Classroom in the bottom left corner and let them know!


If you want these steps in a document click Here!


Tuesday, September 22, 2015

Voice Typing in Google Docs


I’ll admit it. I am a terrible typist. I never took keyboarding (or typing as it was called in my day) in school. My wife taught keyboarding for years, and she now spends many days sighing and shaking her head at how I hunt and peck at the keyboard. The comforting thought is that I am not alone out there. There are many others (although they may be school students) who are also poor typists. Well, I have good news. Google to the rescue! If you are in a Google Document, typing can be as easy as talking! Check out Voice Typing!


Voice Typing in Google Docs


  1. Open or create a Google Doc.
  2. Click on the “Tools” tab and click on “Voice Typing”.


  1. On the left side you will see the icon to start dictation. Click on it.


  1. You may get the pop-up asking for the use of your microphone. Click “Allow”.


  1. Go ahead and start talking. Google will transcribe your text. Make sure to say punctuation marks and other characters.


  1. When you are done, click on the icon to disable.


This is a great addition to Google Documents. It works especially well for students with special needs, or just poor typers like me! The future is here! Give it a shot.


If you have trouble or need more help, check out the Google Voice Typing site. Happy Dictation!


If you want these directions in a Document, click Here!


Sunday, September 20, 2015

Re-Using Previously Used Google Forms


I just love them...Google Forms. They work so well and all my data is saved right into my Drive. That is a Win-Win for me! The best part is that I always have the ability to edit and tweak the Form as I need. So, I have spent hours creating all these Forms to give (Pre/Post Tests, Surveys, Data Collection, etc…) and it is a new school year. What do I do? The good news is, “Not much!” All you need to do is “reset” the Form to spill the newly collected data into a new spreadsheet. How do you do that? I am so glad you asked. Follow these steps to get all your previous Forms to be ready for a new year!


Re-Using Previously Used Google Forms


  1. Open a previously created Form that you want to use again this year.
  2. Click on the “Responses” tab at the top.


  1. Click “Delete all responses”. I  know this sounds scary. Do not panic. It really isn’t “deleting” anything.


  1. Click “Ok” on the warning box that comes up to tell you that in fact no data will be deleted. (I told you not to worry!)


  1. Click on the “Response” tab again. You will see that there are “0” responses now.


  1. Click on “Change response destination..”.


  1. In the box that comes up, leave the button for “New spreadsheet” checked. In the name of the sheet add the current school year. This is making another spreadsheet in your Drive with the current year as a name. Click “Create”.


  1. Now when you go back into your Drive, you will see your Form, the old spreadsheet (with all the data still there), and a new one for the current year!


You are all set!

Now you can use these Forms from Year to Year or Trimester to Trimester!

If you want these steps in a Document click Here!


Friday, September 18, 2015

Google Chrome Tips and Tricks


I will admit it… I am a Chrome-aholic. I love Google Chrome! It is fast and does everything I want. It syncs across devices, saves my passwords, and offers awesome extensions. What is not to love about that. Go ahead and dig deeper into your new favorite browser, customize it, and make it perfect for you!

Google Chrome Tips and Tricks


Just a note.
Shortcut keys are shown in PC version. For all us Mac fans, substitute “Control” for “Command”:
PC: Control Key (Ctrl)
Mac: Command Key (Cmd)


Keyboard Shortcuts:
  • Ctrl+Shift+T Opens the last closed Tab
  • Ctrl+J – Go to downloads window
  • Ctrl+H – Go to history window
  • Ctrl+Tab – Navigate Tabs
  • Ctrl+U – View source code of the current page
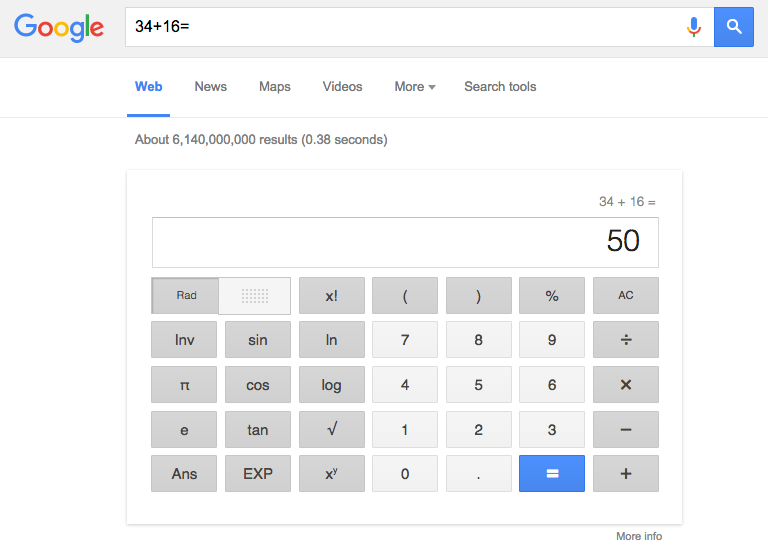
  • Ctrl+K – To search quickly in the address bar
  • Ctrl+L – Highlights the URL in the address bar (use this to copy/paste the URL quickly)
  • Ctrl+N – Open a new Chrome browser window
  • Ctrl+Shift+N – Open a new incognito window (for private browsing)
  • Ctrl+Shift+B – Toggle bookmark display
  • Ctrl+W – Close the current Tab
  • Ctrl+Shift+D – Saves all open pages as bookmarks in a new folder
  • Alt+Left Arrow – Go to the previous page from your history
  • Alt+Right Arrow – Go to the next page from your history
  • Space bar – Scroll down the current web page
  • Shift+click a link – Opens the link in a new window
  • Alt+Home – Go to home page
  • Alt+F – Open the wrench menu (i.e chrome settings menu)
  • Ctrl+2 Opens the second tab open. Whatever tab you want to open, use that number


Basic Tips and Tricks:
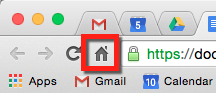
  • Enable the “Home” icon () on the omnibar. Go to “Settings” and under “Appearance”, check “Show Home Button”.


  • Say “OK Google” to do an audio search from any Google search page. Go ahead, ask Google for the time!


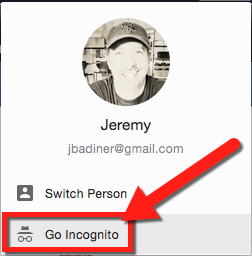
  • Try “Incognito Mode”. It’s like the stealth mode of Chrome. When you are in this mode, Chrome doesn’t record your browsing history. Any cookies that are stored during the incognito mode are deleted when you close the browser. Open a new Incognito window from settings, or press Ctrl+Shift+N.


  • Need to let someone else use your computer but don’t want their searches/login info trapped in your Chrome? Try “Guest Mode”. It will let them log in, do their business, and not muck up your Chrome! Just left click your icon on the top right, click “Switch User”, and click on “Browse as Guest”. You are all set!


  • You can setup multiple profiles with your bookmarks, extensions, themes, and other settings. To do this, go to “Settings” and look for “Profiles”. Click “Add New User” and sign in. Here are the steps I wrote: Add Another Profile to Chrome


  • Click and drag tabs to rearrange their position to reorder how you want.


  • Drag a tab away to make it a separate window and stand out.


  • Click and hold the mouse on the back or forward button on any tab to see the history of that particular tab.


  • To zoom in or zoom out on a page (to increase font size) hold the Ctrl Key and scroll using mouse. Scrolling forward zooms in while scrolling backward zooms out. Ctrl+0 brings the page back to the default zoom level.


  • After downloading a file, you can copy it to the desktop or to any other folder by just  dragging it directly from Google Chrome’s downloads bar (bottom of screen).


  • Easily bookmark a page clicking the “Star” icon () on the right end of the Omnibar. You can also do this with the keyboard shortcut “Ctrl+D”.


  • Use the Omnibar as a calculator for basic calculation. Type a formula in like 34+16= and hit return.


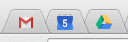
  • Right click any tab and select “Pin Tab” to pin it. Chrome will remember the tabs you pinned and open them next time you open Chrome. Chrome will arrange pinned tabs to the extreme left of your Chrome windows. I pin Mail, Calendar, and Drive or any other pages I visit every time Chrome is open


If you want this post in a Document click Here!